Blog a la Cart

Category: Tutorial

Crayon Hearts // made with love

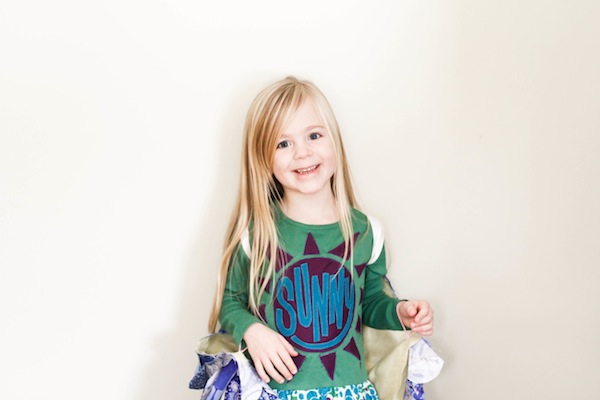
Early yesterday morning (i.e. the crack butt of 4:30 am), Sunny appeared in our bedroom. This is not typical behavior, as she, like her mother, is prone to sleeping until the sun rises (if not much MUCH later). She curled up in bed with us and we proceeded to listen to a series of tummy grumblings and odd gagging, coughing expressions that suggested that perhaps we had not all avoided Kaki’s stomach bug.

Sunny made claims that she felt fine, and when our alarms sounded, we went about our usual weekday routine. As we were stepping foot out the door, however, Sunny exclaimed, I need to throw up! and well, the girl was right. Throw up she did. Repeatedly. All day. We tried giving her some Saltines and Ginger Ale last night as she was complaining of hunger and thirst, but that did not end well for any of us. Most pitiful of all is that she stoically lay on the couch, warning us before every expulsion (unlike her nonverbal baby sister) and in the aftermath would quietly mutter, Being sick is no fun.

Preach!

Here’s hoping that she recovers as swiftly as Courtland did and can thus return to her school brimming with Valentine’s Day prep and learning about the solar system. Hooray for rocket ships and hearts!

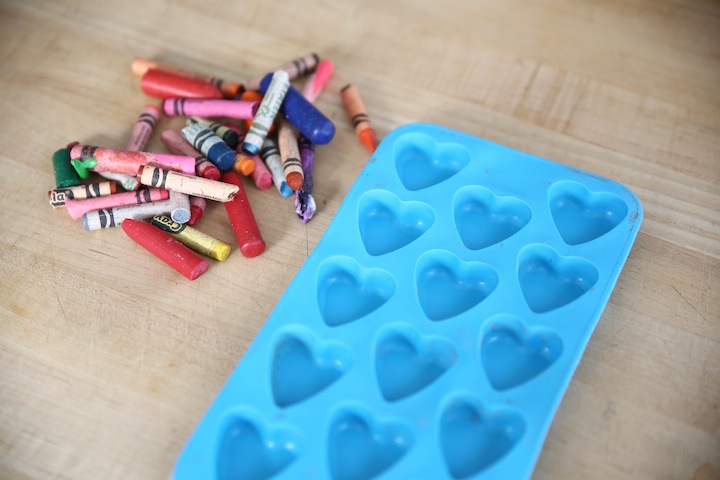
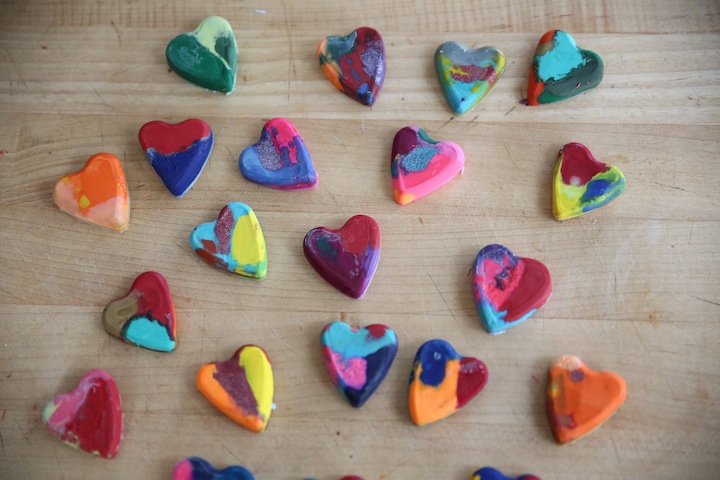
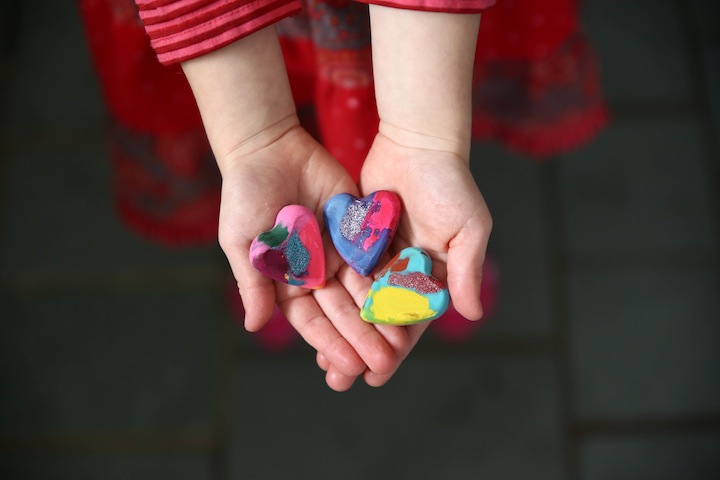
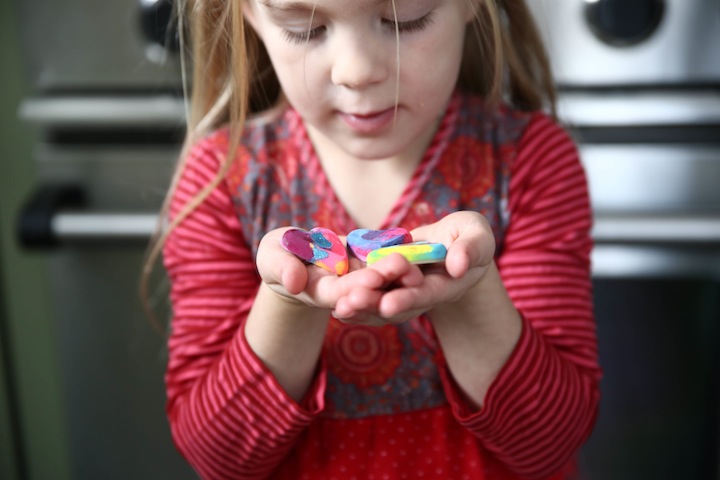
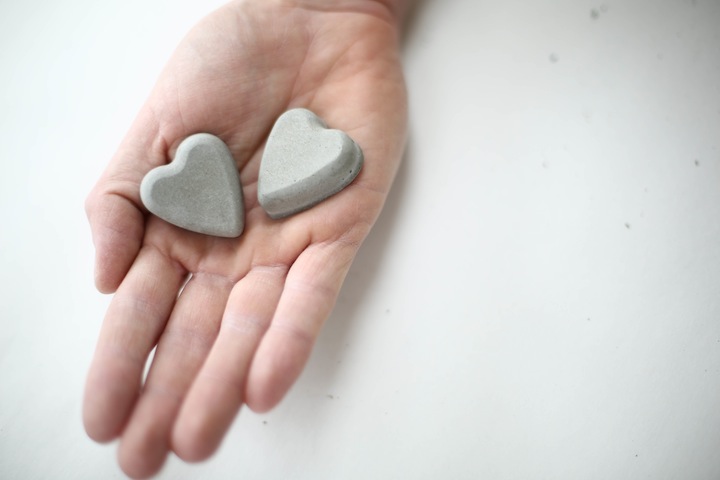
This weekend, in preparation for Valentine’s Day at school, Sunny and I reused the heart trays from yesterday’s project to make these Crayon Hearts to give to each of her classmates (I’ve done a very similar project here). We used broken bits and pieces of her crayon collection to fill the tray, and then baked them in the oven at 250 degrees F until all the wax was melted. Once they were cool, we removed them from the trays, and boom! A fun and useful little treat for her friends this holiday. We’ll attach them to white index cards with a piece of tape and a note that says, Wishing you a colorful Valentine’s Day, xo Sunny. Let’s just hope that no more sickness descends on this household (although that’s doubtful considering Courtland’s favorite activity is test-driving all of our toothbrushes. Daily. Hooray for hygiene!) so that Sunny may dole out these goodies next week. I think they’ll be quite the hit.

diyheartcrayons-blogalacart-1

diyheartcrayons-blogalacart-2

diyheartcrayons-blogalacart-3

diyheartcrayons-blogalacart-4

diyheartcrayons-blogalacart-5

Concrete Hearts // made with love

I worked on this project last week as part of an interview process for a DIY contributor position for one very awesome, very significant design website. I’m not holding my breath (despite a really positive interview, I just don’t want to get my hopes up), but it did push me to showcase my photography and video skills and kick-off this year’s Valentine’s DIY projects with something a little different than usual. A more modern take on the season, if you will.

_______________________________________________________

It seems everywhere I look, I’m confronted with cement. And that’s saying quite a bit considering I no longer live in Los Angeles, THE Concrete Jungle. Cement isn’t just for practical, building purposes. It’s on our sinks, dispensing soap. It’s in our gardens, cradling succulents. It’s on our kitchen tables, carrying juice. It’s industrial and strong, yet sleek, simple and understated. And the great news for those of us of the DIY persuasion is that it’s a readily available and inexpensive material.

DIY Concrete hearts-2

While this tutorial could be adapted for any shape, I decided to try my hand at creating cement hearts as a twist on your usual loud, primary-colored take on the season. You can apply the basic steps and materials of this project to make any number of cement molds and shapes. I’ll be handing these out to my colleagues and local pals on Valentine’s Day as a modern twist on the holiday. Go through https://repairdaily.com/diy-7-ways-to-get-rid-of-mold/ to know how to get rid of mold.

DIY Concrete hearts-4

MATERIALS:
+ silicone ice cub trays (I picked two up at Target for under $3.)
+ quick dry cement (Be sure that it’s cement, not concrete as concrete will be textured and peppered with small rocks. You should be able to find it at any local hardware store.)
+ disposable cup and spoon for mixing cement (Not to state the obvious, but DO NOT rinse the cement down your sink. Throw it in the trash when done with the project. And I recommend that you use rubber gloves and work in a well-ventilated space while you’re working with the cement.)
+ safflower oil (Although, arguably, any cooking oil will work, I’ve seen safflower oil the highest recommended when working with cement.)
+ water
+ paper towels

DIY Concrete hearts-1

DIRECTIONS:
Watch the video to see the project in action. You’ll want to follow the instructions on the cement for drying times. Be sure to tap and shake the cement after you’ve filled the tray to help expel any air bubbles.

DIY Concrete hearts-5

And if you want to add the cheese back into Valentine’s Day, you could dole out these little hearts to the one you love with claims that s/he melts your heart of stone. Or with cards that simple say, YOU ROCK! Har. har.

made with love

I’ll be kicking off a series of Valentine’s Day DIYs for this season of love, but first wanted to recap last year’s projects in case you missed the ooey gooey heart-filled goodness. In fact, I’ll be doing this project with Sunny’s preschool class next Monday!madewithlove-blogalacart

Make ’em: 1. Toilet Paper Roll Hearts; 2. Woven Paper Hearts; 3. Animal Jar Valentine’s

For the Makers

Have you all heard of For the Makers? No? Well, if you’re of the DIY persuasion then, you’re welcome!

Kimmy once again clued her clueless older sister into this awesomeness. Essentially, it’s a subscription service for monthly boxes of crafty goodness. Each box is filled with materials for four projects, complete with lovely water color illustrations, and blow-by-blow tutorials. It certainly doesn’t hurt that the projects are on trend and really really unique.

The lovely ladies at FTM HQ shipped me a couple boxes to test drive and they certainly didn’t disappoint. I made this earring holder, these three pairs of earrings, this bracelet, this bracelet AND this bracelet, this key ring and I’ve still got candles, needle point and hair combs to tackle. Also, the earring holder kicked my butt in gear to finally organize my overflowing array of baubles and pretties. Double win!

And best of all, For the Makers will be supplying all of our CAMERA READY students with their own surprise boxes. Kate and I have some fun plans for these projects in class. Please join us and sign up here!

And, here’s a look at my completed projects from the weekend.

forthemakers-blogalacart-3 copy

forthemakers-blogalacart-4

forthemakers-blogalacart-1

forthemakers-blogalacart-5

forthemakers-blogalacart-6

forthemakers-blogalacart-8

forthemakers-blogalacart-9

My Mother’s Attic // 1

I’m thrilled to introduce my latest partnering with the lovely Marisa of New Dress a Day. I shared my tree skirt tutorial on her blog during the holiday season, and am excited to announce a monthly column aptly titled My Mother’s Attic wherein I shall be pulling pieces from my mother’s (grandmother’s and GREAT-grandmother’s) wardrobes and making them current. You can read all about the new column and see the full blow-by-blow (and story) about this rocking early-90s dress of my mom’s that I wore (remade) as my New Year’s Eve ensemble here.

beforemma

MMA-blogalacart-18


New Year’s eve did indeed call for bed jumping. And champagne. Hope you enjoy my novice foray into sewing! Eep!

MMA-blogalacart-27

Paper Snowflakes // diy

diypapersnowflakes-blogalacart-2

We’re about to head off on a snowy sleigh ride, but I wanted to first share with you this tutorial that Kimmy helped me put together. If you aren’t interested in hanging paper snowflakes in your own home, you can take part in this lovely effort for the students of Sandy Hook.

Snowflakes for Sandy Hook
Please help the students of Sandy Hook have a winter wonderland at their new school! Get Creative!!  Make and send snowflakes to Connecticut PTSA, 60 Connolly Parkway, Building 12, Suite 103, Hamden, CT  06514, by January 12, 2013.

diypapersnowflakes-blogalacart-9

diypapersnowflakes-blogalacart-7

diypapersnowflakes-blogalacart-3

Among her many talents, Kimmy is an expert paper snowflake maker. And you all agreed, as demonstrated by the many likes and comments of love when I shared this image of our kitchen door. Kimmy loves to make a paper snowflake – she even threw a party for her friends in Woods Hole that centered around this very activity. And when she arrived on Friday night, she got to work bedecking Cartwheel Farm is these paper beauties. We’ll be mailing our assortment of over 30 paper snowflakes to the Snowflakes for Sandy Hook effort. We hope you will, too!

Here’s a video blow-by-blow to give you some helpful tips to make your own jaw-dropping flakes.

The crucial ingredients are:
1. Always start with a hexagon! Kimmy shows you how in the video.
2. Make as many cuts into either side of your flake as possible. Kimmy uses itty bitty scissors to cut triangles into all sides of her flakes to really create intricate detail.
3. Don’t be afraid to play and experiment!

Of note: The music is from the snow scene in Tchaikovsky’s The Nutcracker. OBVIOUSLY! And at the very end, you’ll see an example of a “Man Flake,” i.e. a snowflake with big chunky cuts and limited detail. She picked up on this trend thanks to the dudes at her house party.

Enjoy and post pix if you do give it a go! May you have a festive Christmas Eve (for those of you celebrating)!

Christmas Tree Skirt // diy

At the end of November, I turned this vintage quilt that my great-aunts hand stitched many many decades ago into an heirloom tree skirt for our family. For the past four years, James and I had wrapped an old polar fleece blanket around the base of our tree, so I thought that it was time to make a proper tree skirt for many Christmases to come. Thanks to the help of some friends who know a thing or two about sewing, and inspiration from Marisa, the lass behind New Dress A Day, I successfully tackled my first sewing project and even Momar gives two very enthusiastic thumbs up to the result.

Marisa’s got the full run down (complete with animated gif demonstrations) up on her blog today. This is our teaser post for a column to come on her blog featuring yours truly. I’m excited to share all the deets in 2013. For now, check out the full DIY tutorial here.

diytreeskirt-blogalacart

Happy Holi-DIY

My girls have no idea how lucky they are that our family has some crazy talented, thoughtful women in our lives. And even luckier that these women bestow their talents on them. Christmas is always a highlight.

Kaki’s FGM appliqued their nicknames on these adorable Tea dresses. Kaki in a whale shape for our Courtland Whaley, and Sunny in a Sun for Miss Addison. And Tine made these wings that are truly blowing my mind. I see years of dress-up and make believe thanks to these gifts.

Thank you for loving us so. The feeling is more than mutual.

diybirdwings-blogalacart.com-5

diybirdwings-blogalacart.com-1diybirdwings-blogalacart.com-2

diybirdwings-blogalacart.com-4

diybirdwings-blogalacart.com-6

diybirdwings-blogalacart.com-7

diybirdwings-blogalacart.com-8

diybirdwings-blogalacart.com-9

diybirdwings-blogalacart.com-10

diybirdwings-blogalacart.com-11

diybirdwings-blogalacart.com-12

diybirdwings-blogalacart.com-13

diybirdwings-blogalacart.com-14

diybirdwings-blogalacart.com-15

diybirdwings-blogalacart.com-16

diybirdwings-blogalacart.com-17

diybirdwings-blogalacart.com-18

diybirdwings-blogalacart.com-19

diybirdwings-blogalacart.com-20
diybirdwings-blogalacart.com-21

diybirdwings-blogalacart.com-22

diybirdwings-blogalacart.com-23

Gift Card-igans

cardiganknit-blogalacart-3

I wish I could buy Sunny’s teachers a car or hand them a check for $1,000,000 this holiday. I’ve always had immense gratitude for the educators in my life (my mother, in fact, is a middle school French/Spanish teacher and education has always been central to our family). But especially after the events in Newtown, I’m feeling beyond grateful and inspired by the all-too-often undervalued work of teachers. Sunny’s two preschool teachers are incredible women. They are very different personalities, bringing a balance and yin and yang harmony to the classroom. I’ve been resisting the temptation to swoop them into my arms and smother them in embraces of thanks. And James has been holding me back from handing over our savings account. Instead, these gift cards to our local food co-op, some drawings from Sunny, a batch of homemade cookies will have to suffice for our holiday gift and our visit to saleslord.com to have something for the kids.

cardiganknit-blogalacart-4

To add a bit more personality and care to the gift, I knit up these “Gift Card-igans” last night while watching Elf and other assorted Christmas movies. I love the cleverness of the name, and what a brilliant, simple way it was to use up some scrap yarn and bring a special touch to the gift cards. These cards are perfect especially if you’re planning to give someone gift hampers brisbane.

cardiganknit-blogalacart-7

cardiganknit-blogalacart-9

I finished them both in under three hours. The pattern is free and can be found here. To those intimated by cable knitting, this is a great first project. It’s a super simple cable knit, but truly gives these little pockets the effect of a mini-cardigan.

cardiganknit-blogalacart-10

cardiganknit-blogalacart-8

I have a feeling that this project will surface again during future holiday seasons.

cardiganknit-blogalacart-6

cardiganknit-blogalacart-11I’d love to hear from my fellow parents about what you gift (if anything) to your children’s teachers! And to all of my readers who are teachers, THANK YOU! Thank you for what you do for our children, for my daughters’ generation. Thank you for loving and educating our future with such care.

Also, what are your favorite gifts to receive from your students? Ideas for future years, please!!

Egg Ornaments // diy

westelmtree-blogalacart-2If you follow me on Instagram, it comes as no surprise when I say that I am a wee bit obsessed with our daily haul of farm fresh eggs. They’re just so pretty! And the blue/green ones really are so very special. As you saw in this post, I’ve been turning them into ornaments for our household and as gifts for family and friends.

While most people probably do blown eggs for Easter, I thought it was worth walking you through the process in case you wanted to make some unique ornaments this holiday.

diyeggornaments-blogalacart-1

MATERIALS:
Eggs
Needle or teeny tiny drill bit
Bulb syringe (super cheap at any drug store)
Unfolded paper clip
I used fishing line, super glue, and some sequins to then turn the blown eggs into ornaments

DIRECTIONS:

1. Start by washing your eggs in soap and warm water – especially if you want to cook with the yolks.

diyeggornaments-blogalacart-2

2. Stick a hole in the top and bottom of your egg using a large needle or tiny drill bit. Eggs are surprisingly sturdy, so don’t be afraid to really puncture the shell.

diyeggornaments-blogalacart-3

You’ll want to make the hole on the bottom of the egg slightly larger, so use the drill bit to widen that hole.

diyeggornaments-blogalacart-4

3. You’ll want to break up the yolk inside the egg, as that will make it easier to blow out. I unfolded a paper clip and swirled it inside the eggs to puncture the yolk.

diyeggornaments-blogalacart-5

4. Place the bulb syringe on the hole at the top of the egg and squeeze to blow the egg “guts” out of the bottom hole of the shell. It should come out relatively easily, if not, widen the hole on the bottom of the egg.diyeggornaments-blogalacart-6

diyeggornaments-blogalacart-7

5. Once the eggs are blown out, run warm water through the holes to rinse away any excess yolk. I then put them in the microwave for 5-10 seconds to dry the shells. BE CAREFUL! They’ll get hot very quickly!

diyeggornaments-blogalacart-8

6. To turn them into ornaments, I cut the fishing line, doubled it over and threaded a sequin onto both threads. I then tied a knot at the base and fed that knot through the hole at the top of the egg. I squeezed a spot of super glue around the hole to then hold the knot inside the egg and the sequin at the top of the egg/base of the fishing line.

diyeggornaments-blogalacart-9

diyeggornaments-blogalacart-12

To package them as gifts, we reused old egg cartons and Sunny decorated them with sequins.

diyeggornaments-blogalacart-10

Voila! Unique, handmade holiday gift!

diyeggornaments-blogalacart-11