Blog a la Cart

Category: Tutorial

Santas and Elves and M&Ms, oh my!

masonjarxmas_blogalacart-4

This spread of Santa and Elf jars is headed to the girls’ schools tomorrow to spread some holiday cheer. This was a really cute and age appropriate DIY for the kids. Over the course of two evenings, they sorted M&Ms into green and red piles, and then divided them into 20 different mason jars so that every conceivable teacher was accounted for. James and I sat back and enjoyed some egg nog by the wood stove as they busied themselves. They made extensive lists of who should receive a jar, including school nurses, and bus drivers, and cafeteria cooks. I printed out tags and Sunny wrote out each of the teachers names. They needed some help tying the tags on the jars and adding the flair, but it was definitely a nice change of pace to have so much of the project executed, without adult assistance, by the kids themselves. They’re learning the joy of not just receiving gifts, but of being on the gifting side of the equation. masonjarxmas_blogalacart-3

masonjarxmas_blogalacart-1

O Christmas Tea!

christmasteatrees_blogalacart2015-3

O Christmas Tree! Oh Christmas Tree! How lovely are your tea leaves. 

This project is pretty dang endearing, and was perfect for gifting to a number of the girls’ teachers this Christmas. Tea and cookies – a nice gesture of thanks and good cheer to the adults in their lives who nurture and support and inspire and teach them alongside their parents and friends. From classroom teachers, to babysitters, to swim coaches, to violin instructors, to ballet teachers, we are so grateful to have a tribe of wonderful grown-ups helping us develop them into passionate, thoughtful, well-rounded people (or so we aspire!). We have one more project in the works for gifting that I’ll share next week, but it’s been fun to work together as a family to create, bake, and write words of thanks and giving.

This project is relatively simple, and definitely wins on presentation.

Supplies:
An assortment of teas in individual bags (I opted for a variety of green packaging – so Peppermint, Green Tea and Irish Breakfast)
Styrofoam cone as tree structure (found at any craft store like Michaels)
Glue gun
Festive tree topper (I used toothpick cupcake toppers with seasonal snowflakes)

To adhere the bags, I put a strip of hot glue at the top of each bag, and beginning at the bottom of the cone and working my way up, glued them on until the tree was covered. The girls added the tops and determined the “pattern” for the tea bags. A team effort by all. And voila! Christmas Teas!

christmasteatrees_blogalacart2015-1

christmasteatrees_blogalacart2015-4

christmasteatrees_blogalacart2015-5

Vermont Adventuring

photo 1 copy

Saturday we went on a grand Vermont adventure, inspired by Sunny’s inaugural Odyssey of the Mind competition at a high school just south of Burlington.

Yes, apparently OOTM is even for kids as young as five. And it was as awkward and adorable as you might imagine. I didn’t have a OOTM program at my school growing up, but I have many friends that did and they got to do some pretty rad, nerdy, awesome projects thanks to the program, so when it was offered as a free extracurricular after school for Sunny, we jumped at the opportunity.

James and Sunny road a 6:30am school bus up to the high school, and Courtland and I joined them later in the afternoon. After watching the five minute presentation by Sunny’s team, the kids loaded the bus back up with their cardboard creations, and we Carts headed a little further north to explore Burlington.

Um, what an awesome AWESOME college town. I can’t believe that I’d never been. We ate great food. Had a great time exploring. And I purchased insane amounts of yarn at a great little yarn shop filled with local skeins. I am officially obsessed and looking forward to our next chance to venture north, preferably in more temperate conditions. And with our dSLR camera in tow. Below, a few iPhone snaps of our tour of the Green Mountain State. We heart Vermont!

photo 4

IMG_0870

^^Courtland was so eager to help and feel a part of the team with her big sister. It was like Lord of the Flies with cardboard in the hallways, though. Mass chaos. A big part of the program is that the kids are self-sufficient and do their projects from start to finish (including loading and unloading the bus) without adult influence/aid. And so, the chaos level was at an all-time high with a group of Kindergarteners let loose and independent.^^

IMG_0856-2

^^The team, presenting their take on the theme “Wacky Weather.” I particularly loved Sunny’s “TV” where she scrolled and offered up different drawings of weather thanks to those cardboard tubes and a long sheet of paper. She’s pictured above showing off a sunny day. How appropriate.^^

photo 2 copy 2

photo 2 copy

photo 3

^^Playing on frozen Lake Champlain was a huge hit. And the people ice sailing? So bad ass.^^

photo 5

^^As we passed through Middlebury en route home, James detoured to show me and the girls his summer stomping grounds. The girls had trouble believing that he canoed and swam in that frozen lake – but in just a few years, they’ll experience it themselves. Heyo canoe camp!^^

Snowflake Ballerinas

snowflakes_blogalacart-1

snowflakes_blogalacart-2

snowflakes_blogalacart-3

snowflakes_blogalacart-4

snowflakes_blogalacart-5

We had a wonderful, snowy Thanksgiving, complete with Friday morning’s 2nd Annual Pie Breakfast with family, friends and neighbors. On Saturday, we ventured down the street to the local Christmas tree farm and got to decorating Cartwheel Farm for the upcoming season. My favorite addition to this year’s decor had to be these snowflake ballerinas. So elegant. So simple. So very lovely. Kimmy made an array of gorgeous paper snowflakes (see this video for her tutorial on how to obtain the ideal paper snowflake. It’s also embedded below.) and then we slid the snowflakes on ballerina silhouettes. (Download three here, here and here). I would recommend using heavier card stock for the ballerina silhouettes, and standard printer paper for the snowflakes.

I used clear fishing wire and Scotch tape to hang them around the house.

Swoon!

Rainbow Party

rainbowbirthdayparty_blogalacart

Sunny’s birthday was indeed a rainbow-a-palooza. This is the kid who asked for a rainbow as her gift from Santa two Christmas’s ago, and who answers “rainbow” when asked her favorite color. All one need do is peek at her The Sunny Side series for proof of her love of all things Red, Orange, Yellow, Green, Blue, Purple.

It was admittedly a really really fun party theme to put together. Though Auntie Kimmy couldn’t attend the party, she helped with many a party idea, including this perfect free-printable Rainbow invitation. Sunny and I had fun assembling those for her five guests. (We expanded the guest list a bit for our closest friends and family, but Sunny had five friends from her preschool classroom in the mix, which was such a brilliant, manageable size. My mother has always said that the best rule of thumb is to invite the number of kids equivalent to your child’s age. Smart woman, that one.)

We were very fortunate to have a gorgeous spring day for the festivities, so we set up everything outside in our backyard where our swing set and other outdoor toys were easily accessible for play. Considering the addition of equipment from a softplay company might offer a broader range of play options, ensuring more diverse and stimulating activities for the kids to enjoy during such outdoor celebrations.

rainbowbirthdayparty_blogalacart-12

The party began with “The Rainbow Station.” We hired a local facepainter and had rainbow tattoos from Tattly and rainbow pony bead necklaces that Sunny made for each of her friends up on the rainbow picnic table. As guests arrived, they headed to the Rainbow Station for rainbow facepaint and tattoos and necklaces. I was so so impressed by each of the girls’ facepaint designs. And totally bummed when Kaki refused to join in the fun. That kid has strong, unchangeable feelings these days.

Everyone was transformed into a Rainbow Explosion of Awesome.

rainbowbirthdayparty_blogalacart
rainbowbirthdayparty_blogalacart-3
rainbowbirthdayparty_blogalacart1
rainbowbirthdayparty_blogalacart-13
rainbowbirthdayparty_blogalacart4
rainbowbirthdayparty_blogalacart-15
rainbowbirthdayparty_blogalacart-29
rainbowbirthdayparty_blogalacart2
rainbowbirthdayparty_blogalacart-8

I’m completely bummed that I failed at documenting our food/drink spread on our back deck. Sunny and Kaki woke up from their naps just before the party (when I thought I’d be running around snapping a few “before” pix, but instead was drawing rainbow chalk into my daughters’ hair. We used this hair chalk and it was messy but just right for the occasion.)

We’d strung a slew of Sunny’s rainbow paintings across the deck with rainbow lanterns. We had a big bowl of rainbow goldfish and Skittles that we’d arranged in rainbow order. My favorite touch was the rainbow fruit skewers: Raspberry (red), Clementine slice (orange), Pineapple (yellow), Green Grape (green), Blueberry (blue) and Purple Grape (purple). Loved those so. We had a cooler of juice boxes alongside a cooler of beer for the parents, and big pitchers of fresh squeezed mint lemonade. We picked up simple rainbow cups, plates, napkins and straws from the local Dollar Store.  And we decorated with the rainbow colored wooden stacking blocks from when the girls were babies, including one that was in the shape of a rainbow (alas, no picture to show for it).

rainbowbirthdayparty_blogalacart-4
rainbowbirthdayparty_blogalacart-5

I even braved baking a six layer rainbow cake. Many a Dark n’Stormy and some moral support from friends late Friday night are perhaps the only reason I saw it through. Sure, it was lopsided, and I used enough food coloring that everyone pooped rainbow for days, but the reaction from the kids when we sliced it open was priceless. Well worth the leaning tower of rainbow and technicolor shits.

Also, how great are those ombré rainbow candles? Found here.

rainbowbirthdayparty_blogalacart-16
rainbowbirthdayparty_blogalacart-17
rainbowbirthdayparty_blogalacart-18
rainbowbirthdayparty_blogalacart-20
rainbowbirthdayparty_blogalacart-23
rainbowbirthdayparty_blogalacart-25
rainbowbirthdayparty_blogalacart-22

And there was present opening… and people definitely got the memo. Sunny is our artist, and she now has enough art supplies to last her all year long.

rainbowbirthdayparty_blogalacart-27
rainbowbirthdayparty_blogalacart-24
rainbowbirthdayparty_blogalacart

Ghillie and Ranger couldn’t come to the party so they sent rainbow ribbon dancers as party favors for all of the girls…

rainbowbirthdayparty_blogalacart-28

And, a rainbow bounce house… which, as you saw, was truly the heart of the party and entertainment. So much fun for the kids, and made socializing with the grown-ups far simpler.

rainbowbirthdayparty_blogalacart-33
rainbowbirthdayparty_blogalacart6 copy
rainbowbirthdayparty_blogalacart-34
rainbowbirthdayparty_blogalacart5

After everyone departed, Sunny coped with the post-party low (WHY DID EVERYONE HAVE TO LEAVE! I FEEL SO SAD INSIDE!) by coloring in the sunshine in her rainbow butterfly flower fairy costume on the S.S. Rainboat, a beloved gift from Kaki’s FGPs.

rainbowbirthdayparty_blogalacart-32
rainbowbirthdayparty_blogalacart-31

Five sure started out with a bang. It’s going to be quite an exciting year. Holding on to our hats and our hearts!

Jellyfish Lanterns

diyjellyfishlantern_blogalacart-7 copy

It’s been quite some time since I showcased a DIY project here. Admittedly, it’s because it’s been quite some time since I’ve done one. I did many knitting projects for Christmas presents and documented exactly none of them (#fail), and have been on a craft/diy hiatus most of 2014.

But the girls’ preschool has their annual fundraiser this coming weekend, and I volunteered to be on the decor committee for the dance on Saturday night. The theme is “Under the Sea,” so I offered to create some spirited albeit elegant jellyfish lanterns for the occasion. I am quite pleased with the result. I made up six of them, and will try to capture some photographs of them hanging in the space for the dance. In the meantime, they’ve taken up residence in our guest room to keep small human and canine paws alike away from them. They are a pain in the butt to transport, so I’ve been ferrying them over to the school one at a time this week.

Here’s how I put them together…

diyjellyfishlantern_blogalacart-6 copy

_______________________________________________________________

diyjellyfishlantern_blogalacart-2

White lanterns, 16″ – $22 for 10 

– I followed the directions included in package and assembled each lantern, tying a piece of clear fishing line to the top to hang them while I assembled the jellyfish tentacles.

diyjellyfishlantern_blogalacart-5
White crepe paper streamers, 500ft – $4.50

– I rolled out the streamers and cut the roll every four feet (or so) to use as tentacles.

diyjellyfishlantern_blogalacart-3
Wavy foil door curtain – $13

– I cut off the top of the curtain that kept the strips of foil attached to one another. I then folded and cut all the strips in half to use as tentacles.

diyjellyfishlantern_blogalacart-4
White plastic table covers – $3

– I cut the table covers into 2-3 inch strips, approximately four feet in length. I then pulled at either side of the strips, along the length of the strip, to create the wavy, uneven effect. These were the final material I used for tentacles.

diyjellyfishlantern_blogalacart
Scissors
Glue gun and sticks
Clear fishing line

diyjellyfishlantern_blogalacart-8

_______________________________________________________________

diyjellyfishlantern_blogalacart-15

I then strung the various tentacles around the bottom third of the lantern, following the row of seams to keep them evenly hung. I used a glue gun to hold them in place, and then covered up the tops of all the materials with one of the strips of wavy plastic.

diyjellyfishlantern_blogalacart-9

I also tied some of the streamers to the inner bar of the lantern to give the tentacles some depth.

diyjellyfishlantern_blogalacart-16

They’re really quite attractive and fun. And they’ve inspired the kids to reenact the jellyfish scene from “Nemo” on the regular.

diyjellyfishlantern_blogalacart-10 copy

diyjellyfishlantern_blogalacart-17

Alas, I have to work this weekend so I’ll miss their debut, but I am hoping that they’re a hit!

Charles

charleswallquilt_blogalacart_1

I’ve admired Marimekko’s fabric selection for some time now. I’ve particularly swooned for this amazing cow fabric (alas, no walls in our home are tall enough for it!). I’m fortunate that the one and only Marimekko outlet is located just 40 minutes north of my home. I was in Manchester during the winter break and was thrilled to find this Rooster print for sale in the outlet. Feeling empowered after making Elias’ quilt and Momar’s quilt, I scooped up Charles (allegedly the name of said rooster) and brought him home to make a wall quilt. It was a straightforward project, but still time consuming, as is the way with quilting. I used Martha Stewart’s velcro suggestion for mounting the piece on our wall (her tutorial here). I’m quite pleased with the warmth and color it adds to our stairwell. My first quilting project for our family!

charleswallquilt_blogalacart_3

^^CHARLES! Perhaps the only rooster that will survive life on Cartwheel Farm.^^

charleswallquilt_blogalacart_2

^^Our itty bitty stairwell makes it difficult to photograph the piece straight on. Thank goodness for wide angle lenses!^^

charleswallquilt_blogalacart_4

^^Charles is becoming acquainted with The Blue Fairy (a painting I purchased for Kimmy when we lived in Southern California at a street fair and that we’re holding for her until she has a home suitable for her magic).^^

Suzani Love

chairredo_blogalacart-6

Last weekend while James was out galavanting at a friend’s birthday (re: a group of dudes shooting skeet, drinking beer, and lighting burn piles aflame. I done married myself a country boy), the kids and I tackled reupholstering this pair of beat up old folding chairs. I purchased that purple, Suzani-esque fabric over two years ago. At least it FINALLY got some use! (I am a fool for Suzani and have been slowly accumulating more original Suzani pieces. But this fabric was far more affordable than those investments.)

chairredo_blogalacart-4

chairredo_blogalacart-9

The kids were bored about 2 seconds in, but fortunately it was a beautiful day, so they played outside on the swing set while I tore the fabric off and scrubbed the chairs down. The girls were highly intrigued by the spray painting process (I gave the chairs a fresh coat of black paint). And while they napped, I covered the seats with the new fabric. Voila! Totally awesome new chairs.

chairredo_blogalacart

chairredo_blogalacart-7

chairredo_blogalacart-2

chairredo_blogalacart-10

So much better. These may be my favorite pieces of furniture in the house now. And just in time for holiday entertaining! My sister and parents arrive tonight for Turkey Day festivities, and we’ll host Christmas as well, so hooray for happy chairs around the table!

Skeleton Costume // diy

diyskeletoncostume_blogalacart-11

I’m just returned from Atlanta, and boy has the late fall weather properly set in. The trees are looking mighty bare, and there’s a distinct chill in the air. I’m bundled up in long underwear, fleece blankets, and wool socks, all in the name of not turning on the heat until November. Such hardy New Englanders are we!

With all that being said, it’s clear that October is coming to a close, which means Halloween is just around the corner! I’m really excited to share with you my first handmade Halloween costume. I attribute this accomplishment to my slow but sure accumulation of minimal sewing skills this year though My Mother’s Attic and my inaugural quilting project.

I’d fallen in love with this hand sewn skeleton costume on Etsy, but when I saw the price tag, I figured that I could try and tackle my own version of the look. I will say, the cost of the Etsy costume is more than reasonable considering the time and effort that went into making Kaki’s, so for those of you who do not find joy in the DIY process, I would highly recommend investing in Small Threads apparel.

skeletoncostume_blogalacart-1

To get started, I purchased Asphalt-colored versions of American Apparel karate pants, solid rib long-sleeve shirt, and baby rib hat in Courtland’s size. I then bought silver thread, white fabric with some silver metallic sheen, and a small amount of red fabric for a heart. I washed and dried everything before beginning the construction!

skeletoncostume_blogalacart-2

I printed out Mini eco‘s skeleton template and traced each bone onto freezer paper. I improvised some of the bones to create pieces for the back of the costume, but the template was a great starting point.

skeletoncostume_blogalacart-3

I then ironed each piece of traced freezer paper onto the white fabric for the bones (and I did the same with a heart trace on the red fabric). The shiny side of the freezer paper goes down on top of the fabric, and the heat of the iron temporarily adheres it to the fabric.

skeletoncostume_blogalacart-4

I cut out each fabric bone with the traced freezer paper as my guide.

skeletoncostume_diy_blogalacart-1

I laid the fabric pieces out on the costume to get a sense of placement and ensure that each piece fit comfortably on the costume.

skeletoncostume_diy_blogalacart-2

Spray Adhesive was a MUST for this project. I sprayed each bone with this Spray Adhesive and carefully laid it out on the base of the costume.

skeletoncostume_diy_blogalacart-3

The great thing about the adhesive is that it is temporary, so I could always readjust the placement before committing to sewing the pieces down.

skeletoncostume_diy_blogalacart-4

Once the pieces were in place, I slowly and carefully sewed them down using a silver metallic thread on my sewing machine. I followed along the edges of each bone to secure each part of the skeleton in place. I then threw the costume in a gentle wash cycle to get rid of any leftover adhesive, and BOOM!

diyskeletoncostume_blogalacart-4

diyskeletoncostume_blogalacart-1

diyskeletoncostume_blogalacart-9 copy

diyskeletoncostume_blogalacart-7

A Bony Baby (er, toddler?) was born!

diyskeletoncostume_blogalacart-8

I couldn’t be more thrilled with the result. It was a lot of time and hardwork, but I am really pleased with how cute and cozy and comfortable the costume is for my picky 2-year old. If the weather is chilly, I can always pile some layers underneath, and of course she can wear the costume as her pajamas for the rest of the winter.

diyskeletoncostume_blogalacart-6

I think it’ll be a Happy Halloween indeed. (And Sunny is going to rock her Lilac Fairy costume (with a fall twist, i.e. LAYERS) one last time as she is very quickly outgrowing its awesomeness. Fortunately, Courtland will get a chance to wear it, too!).

diyskeletoncostume_blogalacart-2 copy

Ice Cream-Palooza 2013

Kaki’s Birthday was a sweet affair, indeed. Since Saturday was her actual birthday, we were able to have the celebrations on the same day. James’ parents’ offered to have the SoCo Creamery ice cream cart come to our home for the party, so an Ice Cream-Palooza was planned.

birthday_blogalacart-1 copy

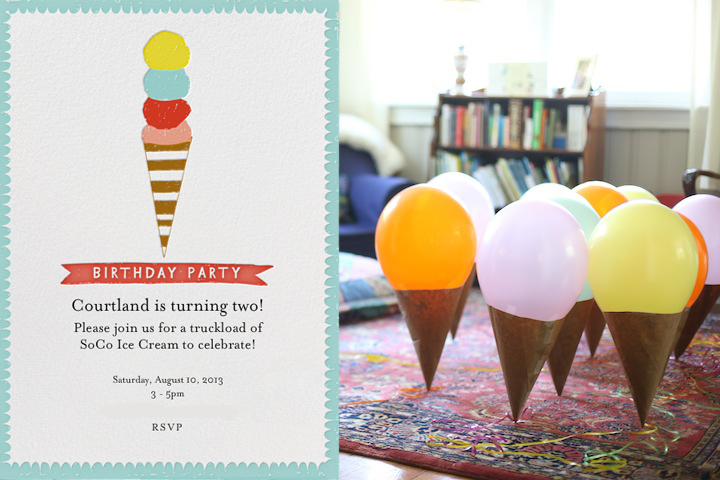
^^Naturally, I had to make some ice cream decor to compliment the party theme. I used this card on Paperless Post for the invitations.^^

birthday_blogalacart-2

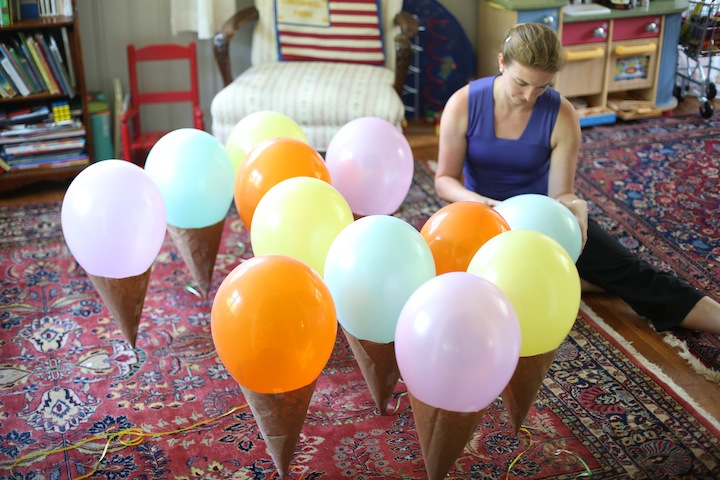
^^ Then, I put my dear college pal Kendra (who was visiting for the weekend) to work crafting up a series of cones for the balloons using old paper grocery bags. When we picked up the balloons on Saturday morning, we attached the cones to the base of the balloons using Scotch tape. Unfortunately, the bags weighed the balloons down so they didn’t float, but we made it work regardless.^^

birthday_blogalacart-3

birthday_blogalacart-4

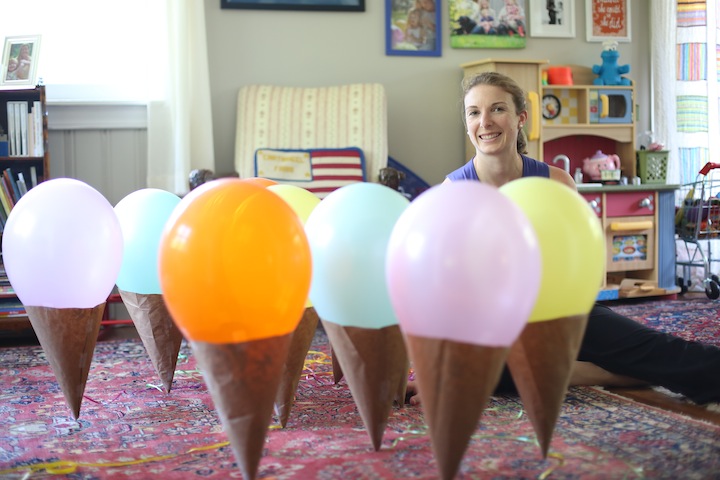
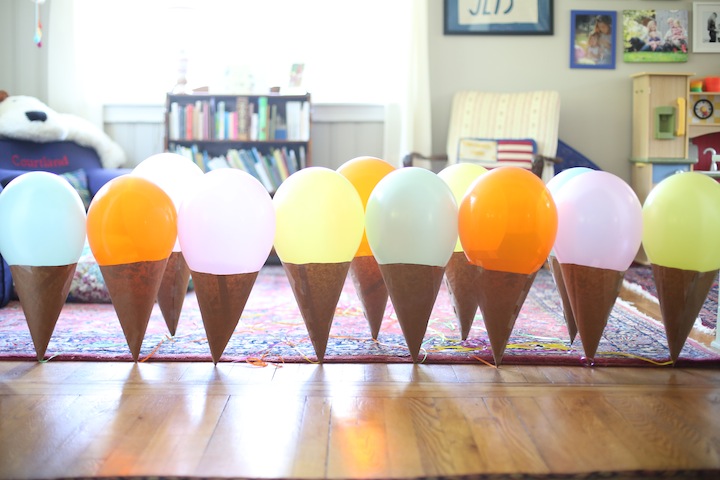
^^Adorable, no? We enlarged this template to create the cones.^^

birthday_blogalacart-6

^^I ordered these ice cream cone bowls from Amazon for party favors for each of the kids. They used their bowls during the party for ice cream, and then were able to take them home at the end of the festivities.^^

birthday_blogalacart-7

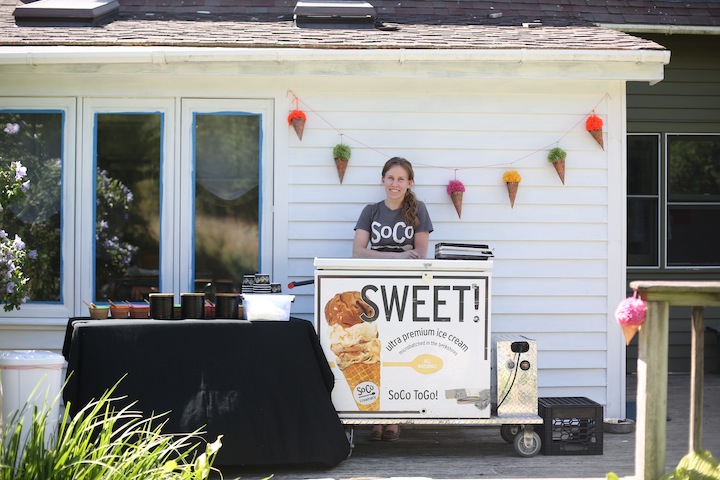
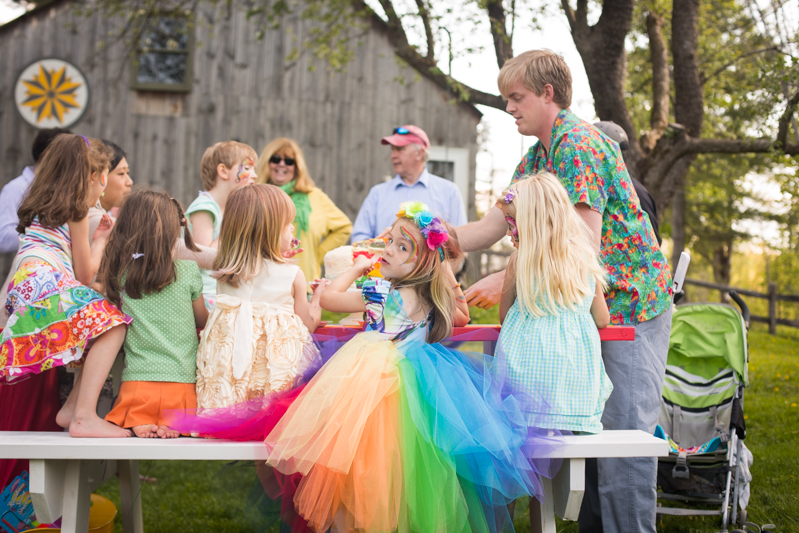
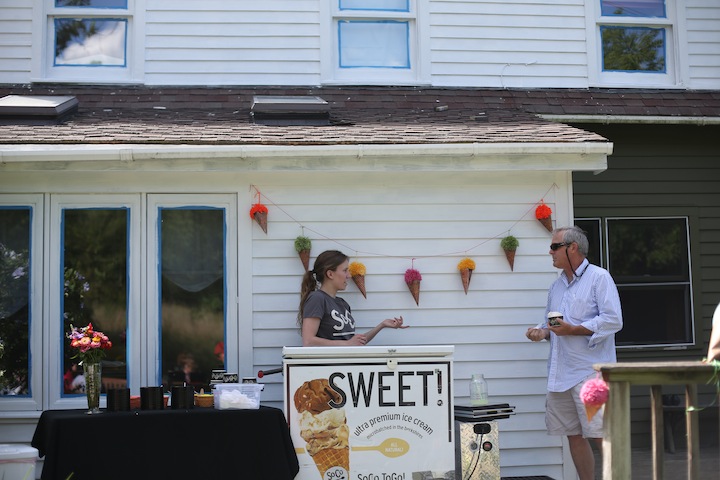
^^We set up the ice cream cart on our deck, and had a SoCo helper scooping for all those eager kids (and adults!). They had five flavors to choose from: Salted Caramel, Dirty Chocolate, Vanilla Bean, Oreo, and Mint Chip. Then, of course, there was a topping station. We discovered Courtland eating a bowl full of rainbow sprinkles later in the afternoon sans ice cream. The toppings were clearly as appealing as the ice cream itself.^^birthday_blogalacart-8

birthday_blogalacart-9

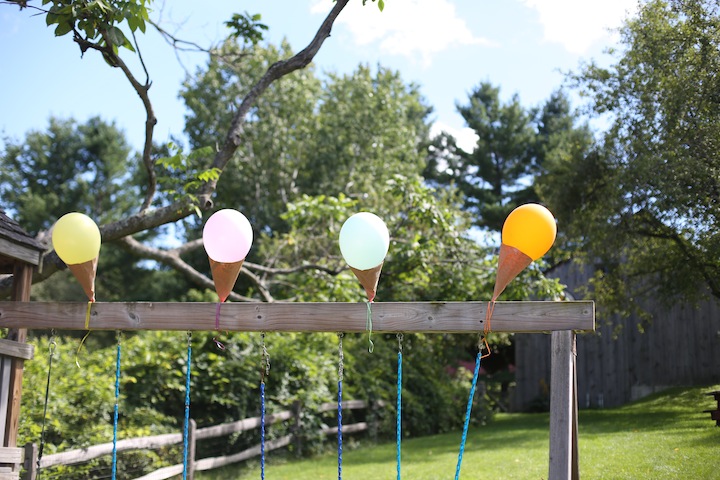
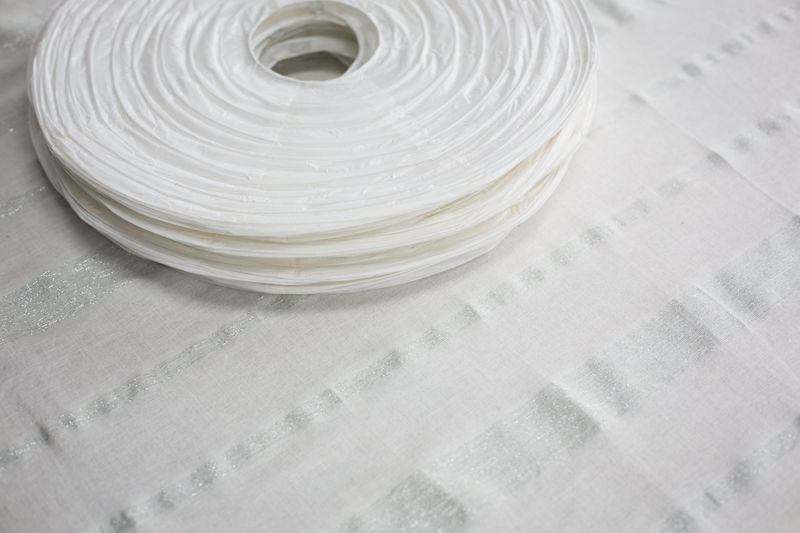
^^Using an extra-large pom pom maker, I created yarn pom poms that Kendra and I attached to these paper cones, and then strung together as a garland that hung behind the ice cream cart.^^

birthday_blogalacart-10

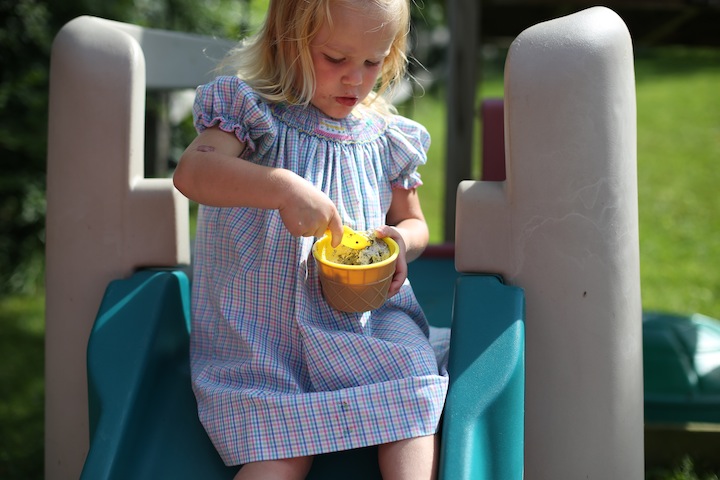
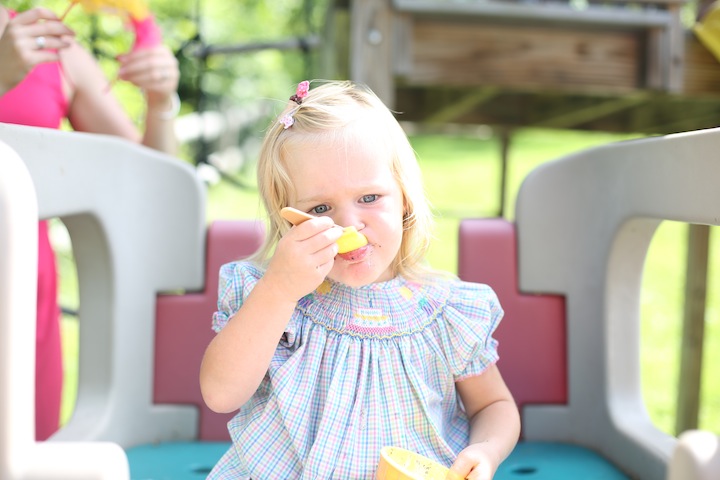
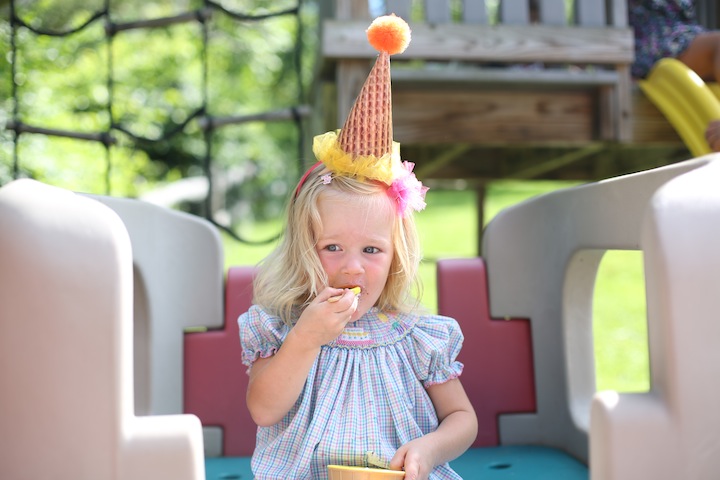
^^Bowl #1 of 800. Granted, of the 7,000 or so calories she was served, I’d say 6,000 of them wound up on the front of her dress.^^

birthday_blogalacart-12

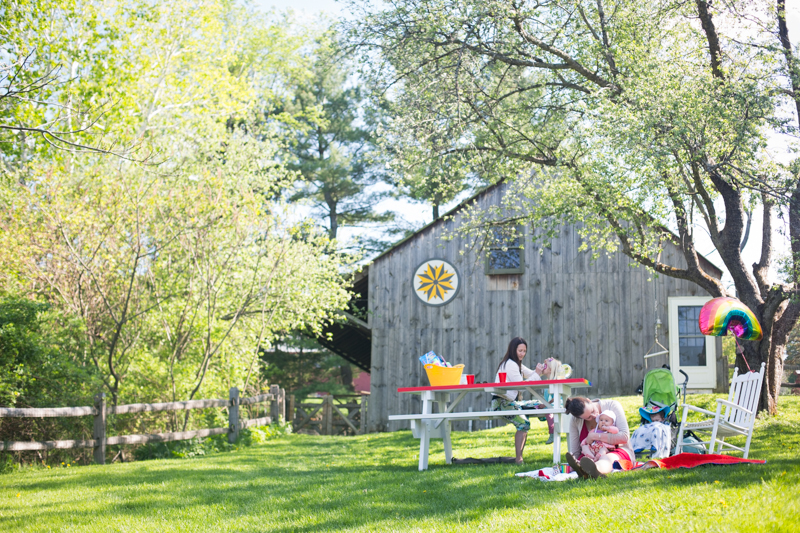
^^We had a simple beverage station of lemonade and sparkling water, with mason jars and colorful straws to compliment the balloons, pom poms, and ice cream cups. Honestly, the kids’ favorite toy during the party was that enormous beach ball, which doubles as a sprinkler, but proved way more fun to kick mid-air while swinging on the swing set.^^

birthday_blogalacart-13

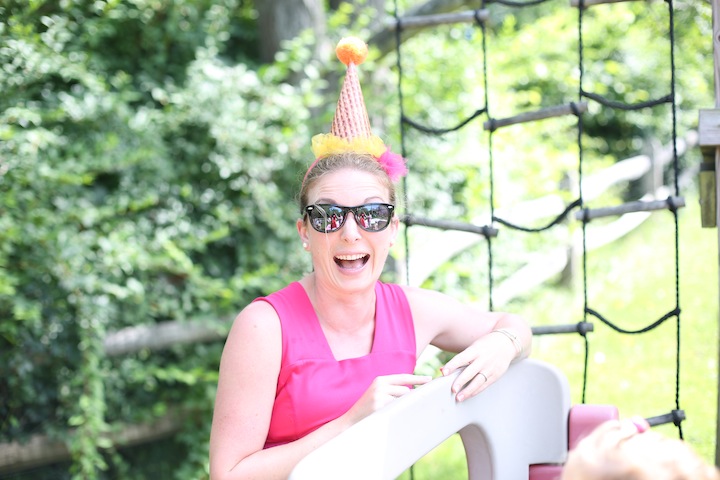
^^Kendra models the ice cream cone crown I created for Kaki, complete with tulle accenting.^^

birthday_blogalacart-14

^^Kendra sneaking in while Kaki is distracted by delicious ice cream.^^

birthday_blogalacart-15

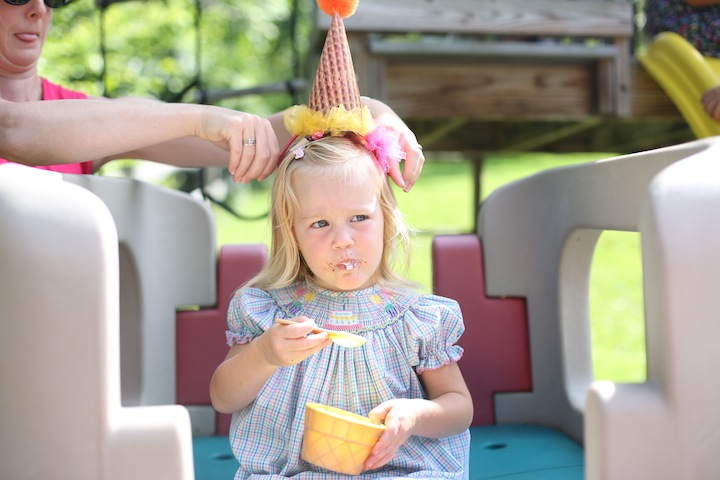
^^That expression says it all. What the?!^^

birthday_blogalacart-16

^^Attempting to shake the crown free.^^

birthday_blogalacart-17

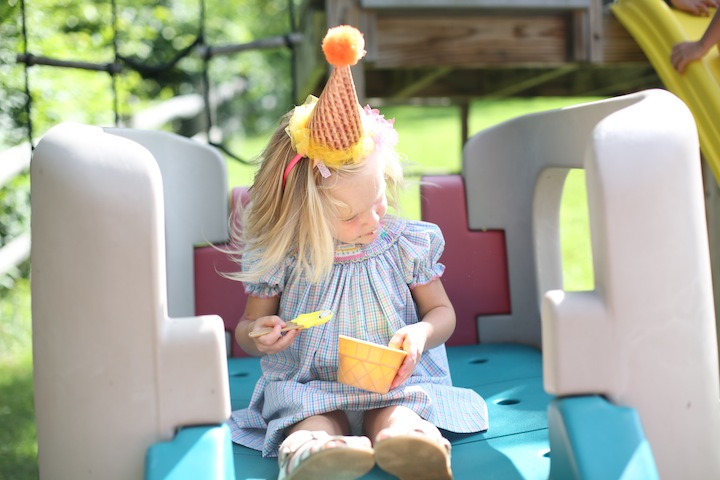
^^She gave up, and returned to the sweets at hand. Smart girl.^^

birthday_blogalacart-20

^^Note the ice cream bow. Thanks, Ann Mae!^^

birthday_blogalacart-21

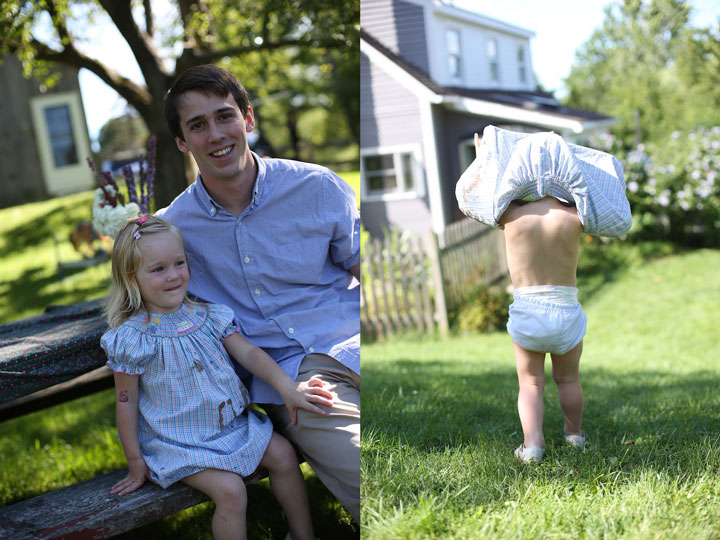
^^This girl loves her Uncle Ben who impressed all of her guests with his crazy cool tricking skills. (No, seriously, watch him in action). Also, she wandered around the yard licking ice cream drips from her dress. It was her party, the girl did what she wanted to.^^

birthday_blogalacart-22

birthday_blogalacart-23

birthday_blogalacart-24

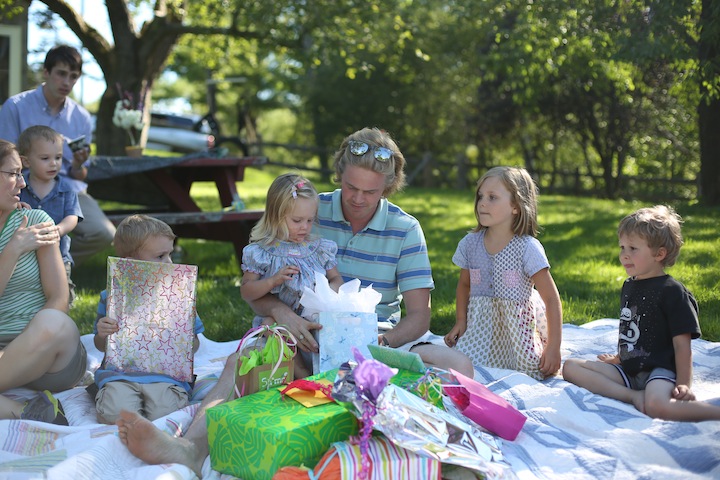
^^Present opening was, of course, a highlight. And check out those chocolate mugs!^^

birthday_blogalacart-26

birthday_blogalacart-27

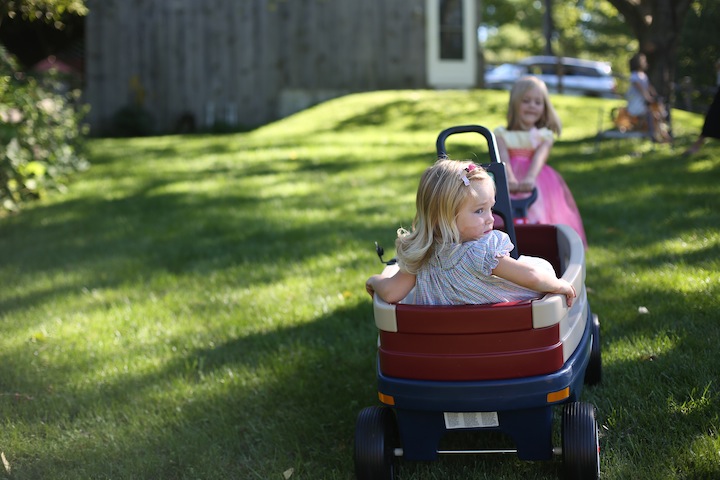
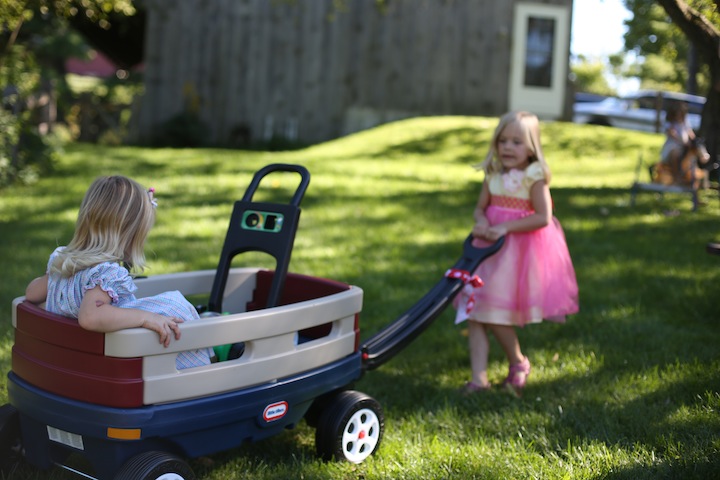
^^James’ parents gifted her this cart, which big sister dragged around the yard with Courtland proudly perched within.^^

birthday_blogalacart-28

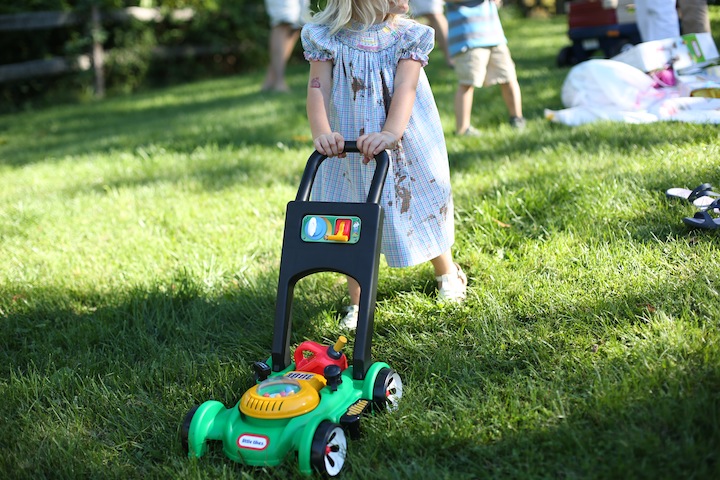
^^She also received this lawn mower from Ghillie and Ranger, so that she can now help Daddy with lawn care.^^

birthday_blogalacart-29

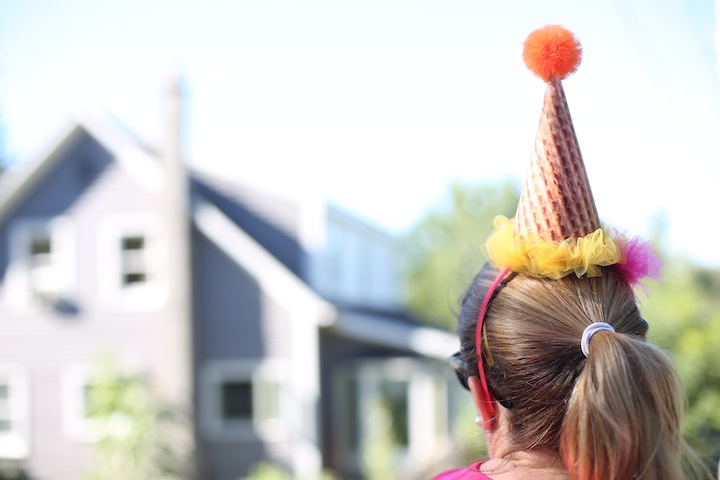
^^Kendra rocked the crown the rest of the party, because, wouldn’t you?^^

birthday_blogalacart-30

^^Overall, it was a happy day. Between the ice cream, and this bucket of bubbles, Courtland was entertained for hours. We heard her still merrily babbling in her crib at 11pm that night. The sugar high was stronger than the post-party exhaustion. My sweet sweet two year old.^^