Garden Sweater
by Ashley Weeks Cart

It would seem that we grow the teeny, tiniest vegetables around. Exhibit A. Exhibit B. And now check out that itty, bitty singular pumpkin our garden was able to produce. *sigh* Better luck next year!
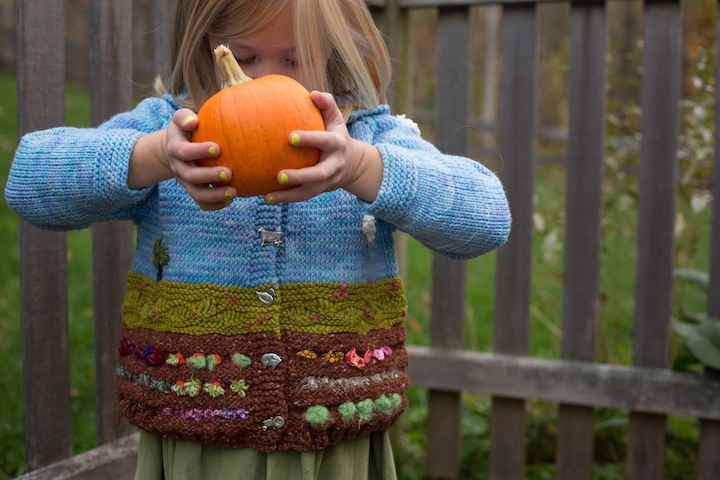
The size of the pumpkin in no way dampened Sunny’s enthusiasm for this wee gourd. She was thrilled when it was finally ready for picking, and it has been on display in our home all month. We’ll be decorating it in googley-eyes this evening, a last minute Halloween DIY (inspired by last year).
Meanwhile, Miss Brie Brie’s family has produced an entire patch of impressively sized pumpkins. We’ll have to learn some tricks of the gourd-growing trade from them next year.
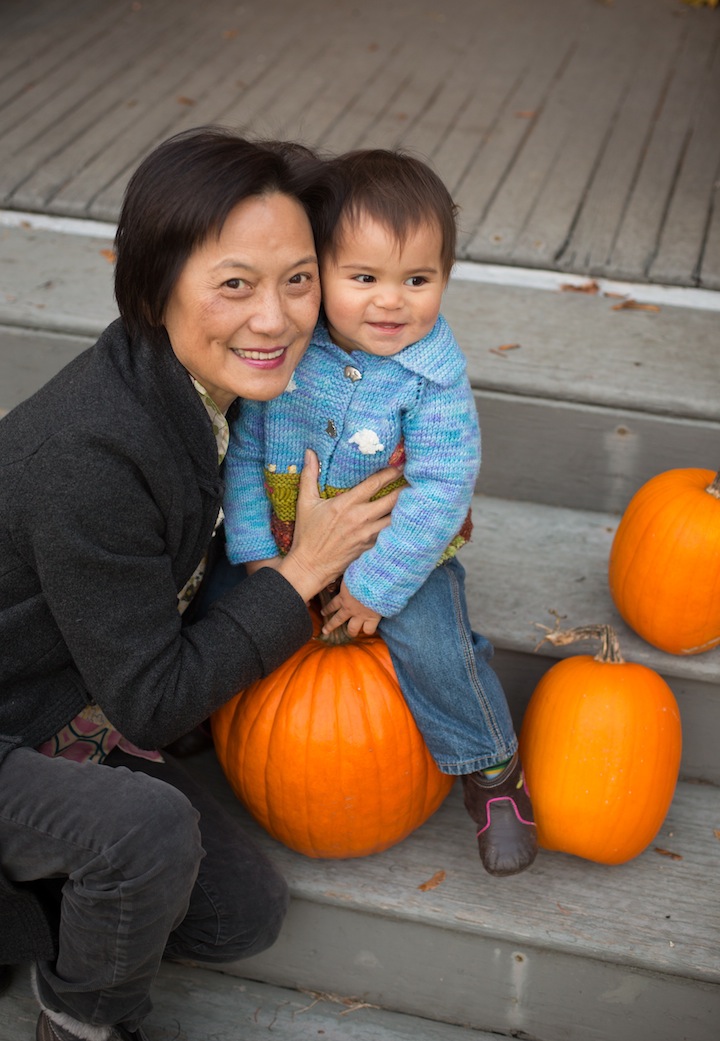
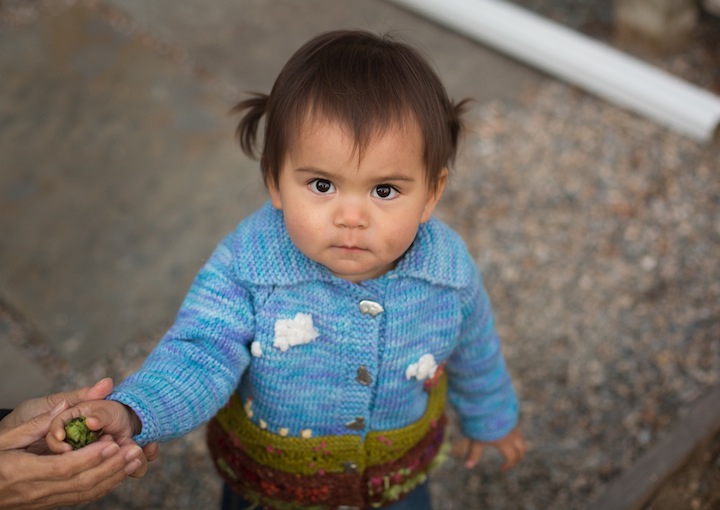
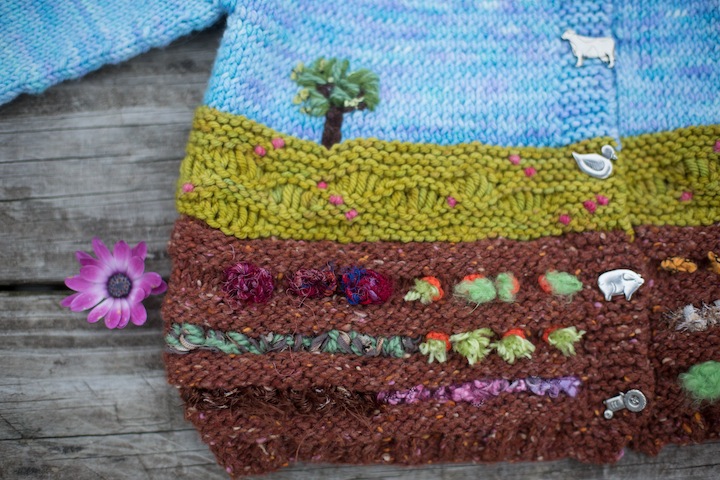
However, I’m not here to showcase the pumpkins, so much as the two finished Garden Sweaters being worn by their respective recepients. I snapped some photos of Courtland wearing Brie’s this spring, but now I’ve (finally) finished Sunny’s – and Brie fits hers! And I’m thrilled to think about another photo shoot in a year or so with Courtland and Lila then rocking the look. The joys of sisterly hand-me-downs!
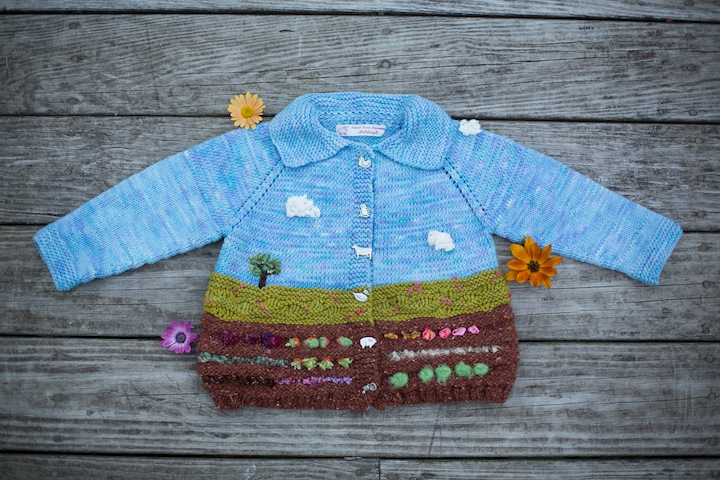


To create the sweater I adapted this pattern, Tasia’s Cardigan, by Dana Gibbons. I made the 1-2 years size for Brie (currently aged 18 months) and the size 3-4 year size for Sunny (currently 4.5 years). To make both sweaters, I used three skeins of the Dream in Color Classy in SOME SUMMER SKY, and one skein of the Dream in Color Classy in SPRING TICKLE. For the garden beds, I used two skeins of Queensland Collection Kathmandu Aran in RUST. I worked on a US7 circular needle.
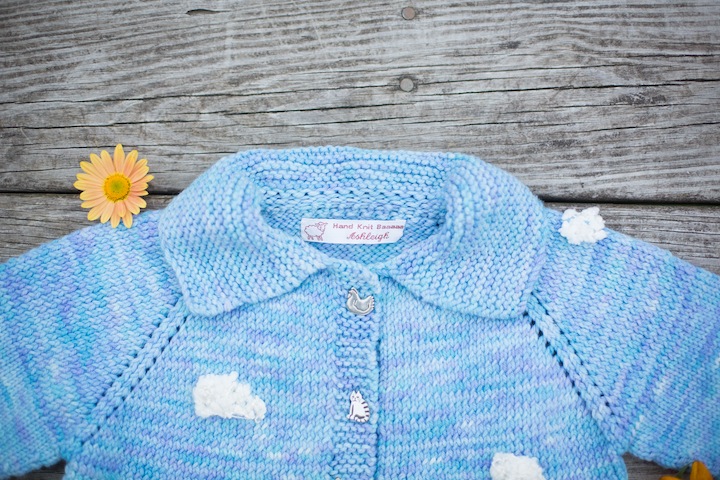
I ordered the crazy adorable pewter barnyard animal buttons from Morehouse Farm here.

I adapted the pattern as follows (being sure to follow the original pattern for the button/center area of the cardigan throughout).
I knit in the Dream in Color, “Summer Sky” until 2 inches below the armpit, following the original pattern as is.
I then worked for 2 inches in the Dream in Color, “Spring Tickle.” I knit six rows in a garter stitch, then worked six more rows in a garter stitch, but on the knit rows I did a wave stitch:
- k5, wrap1, k1, wrap2, k1, wrap3, k1, wrap4, k1, wrap3, k1, wrap2, k5, repeat….
- Purl rows in between knit wave rows
- k1, wrap1, k1, wrap2, k1, wrap 3, k1 wrap4, k1, wrap 3, k1, wrap2, k5, repeat Alternate between those two knit wave rows with purls in between for as long as desired.
Finally, I worked in the Queensland Collection Kathmandu Aran, “Rust.”
Knit 2 rows
Purl 4 rows
Knit 4 rows
Repeat 4 purl rows, 4 knit rows for long as desired.
I finished the sweater with 5 rows of ribbed stitching, 2k, 2p, 2k, 2p, repeat.
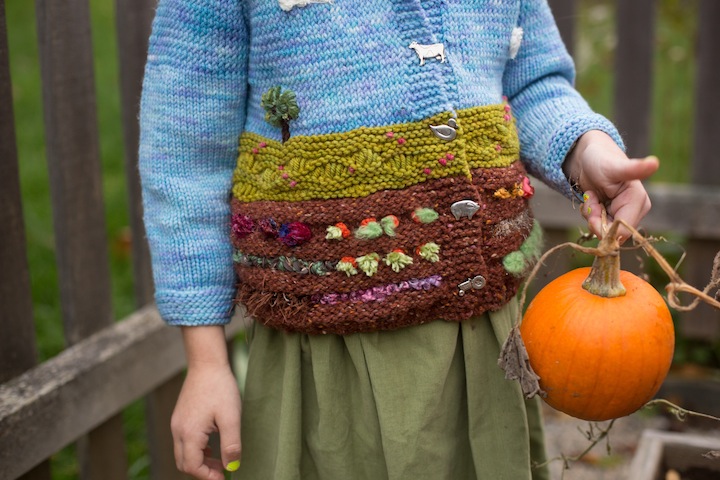
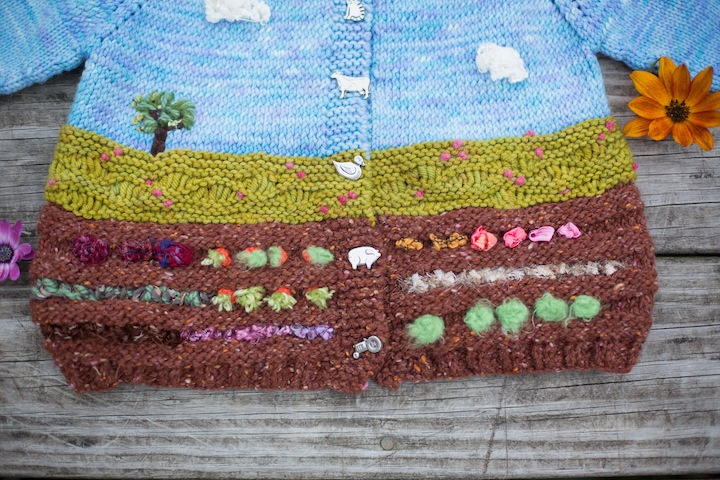
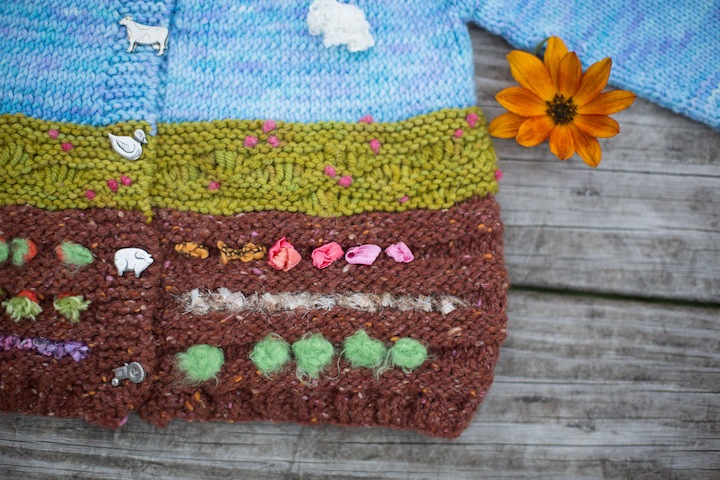
For the details, I used scrap yarn and did a combination of sewing on top of the finished sweater to create the clouds, trees, chickens, etc. For the vegetables, I crocheted pieces of scrap in various ways, and tied them into the knit rows (or ditches of the garden bed). For the rolling hills area, I did French knots in pink yarn to create the flowers. A good tutorial about how to make French Knots here.

There is no right or wrong way to approach adding details to this sweater. It is a whimsical, arty piece indeed, but lots of fun if you’re comfortable getting creative and experimental with a project.
Further details on my Ravelry page here.